Add MyLiveChat to your Drupal site
MyLiveChat Plugin for Drupal lets you collaborate with your Drupal website visitors.
It is fully customizable, pretty light-weight, easy to install and requires just
a free account at MyLiveChat to complete the integration with Drupal websites.
MyLiveChat helps your team answer visitors quickly, collect offline messages, and keep support conversations organized.
It allows you to live chat with website visitors, see helpful visitor context, and keep every conversation available for follow-up.
Request Drupal Plugin
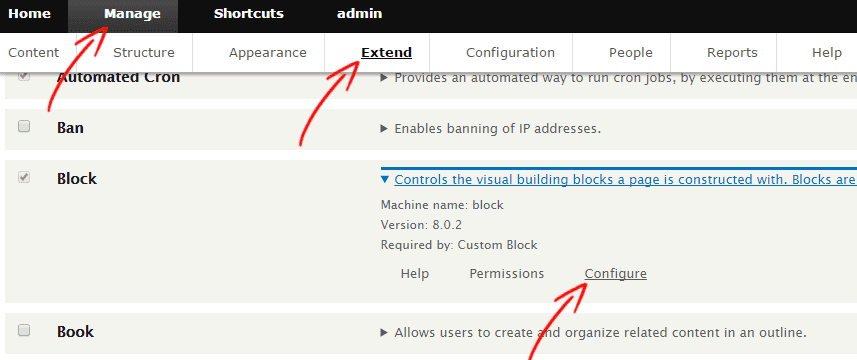
Step 1. Custom block library
Log on as an administrator and open the Manage-->Extend panel, then click on the "Configure" link of the Block. Switch to "Custom block library" tab and click on the "+Add custom block" button.

Step 2. Add custom block
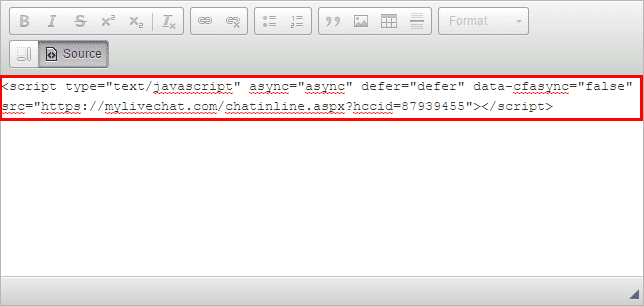
Fill the "Block description" with any name you need and select "Full HTML" option from "Text format" dropdown list, then click on the "Source" button from the editor toolbar.
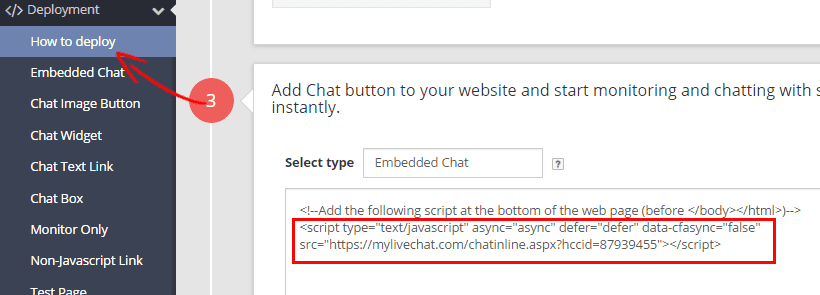
Get your chat code from mylivechat.com/dashboard/deployment.ascx. Paste the chat code into the editor and click Save.

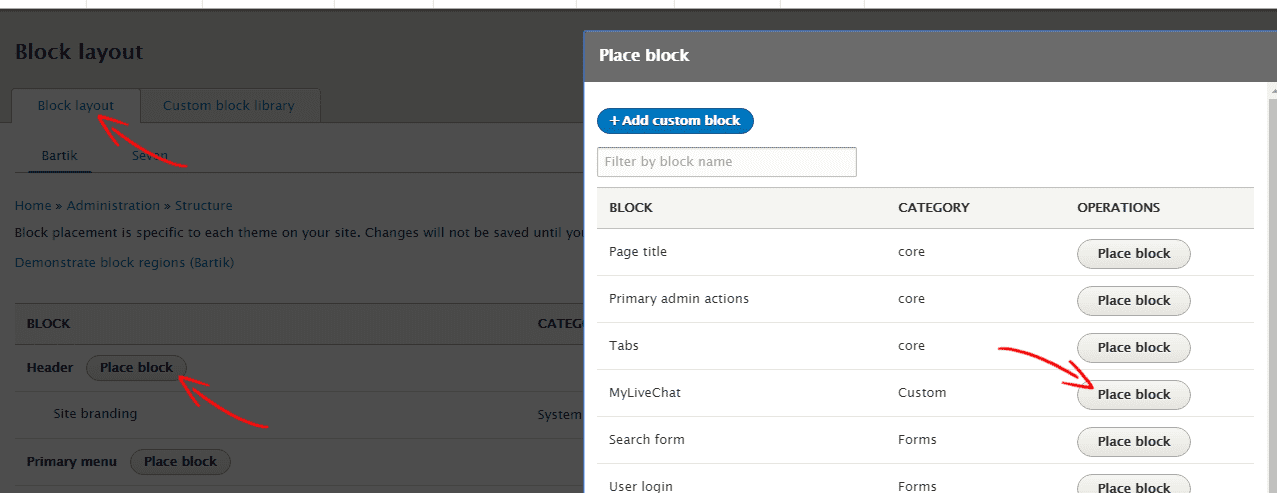
Step 3. Activate "MyLiveChat" block
Return to the Block Layout tab and click the Place block button for the Header region. Select the MyLiveChat block you just created and save.
Step 4. Test "MyLiveChat" now
Check your site — the live chat button should now appear on your Drupal pages.
What's next?
After setup, sign in to the web console to answer visitors from your browser. You can also use the desktop app from the download page if your team prefers it.
Any questions?
If anything is unclear, contact our support team from the chat button on this page or visit the Support page. We can help you choose the right setup path.